DF11 PANELS - INSTRUCTIONS
- DF11 Faces
- Jan 12
- 2 min read
Updated: Feb 10
Please note that DF11 panels will only function in the version for which they were created.
For example, DF11 panels designed for FM24 will only be compatible with FM24.
🔎 The ZIP software you need.
Windows OS users need 'WinRaR' to unzip the downloaded file.
For smooth file extraction, we recommend using the original free WinRAR software.
If you encounter any problems, try '7-Zip' or the default zip software on your PC.
Mac OS users need 'The Unarchiver' to unzip the downloaded file.
For smooth file extraction, we recommend using the default Mac Unarchiver software. If you encounter problems, try 'KEKA' or 'Decompressor' for MAC OS.
Note for Mac: With Mac Unarchiver, you might first need to activate Zip Archive + RAR Archive on the 'Archive formats screen.'

Step by Step video tutorial
🎞️ Credits: Spartanwilly
Installation manual
1 - Download the file.
2 - Unzip the file with the recommended zip software
3 - Add the new 'Panels' folder to the main directory of Football Manager.
Windows (FM10 - FM25)
Documents/Sports Interactive/Football Manager 20**/
Mac OS (FM10 - FM19)
Users/Username/Documents/Sports Interactive/Football Manager 20**/
Mac OS (FM20 - FM25)
Username/Library (=hidden)/Application Support/Sports Interactive/Football Manager 20**/

👉 Depending on your FM version, your panels folder will contain some of these files.

4 - Start your Football Manager game and open the in-game settings:
Move to 'Preferences > Advanced > Interface.'
* Select the default Football Manager skin.
* Click the "Clear Cache" button 1x.
* Deactivate the line: "Use caching to decrease page loading times."
* Activate: "Reload skin when confirming changes in preferences."
* Confirm the changes to reload the skin.

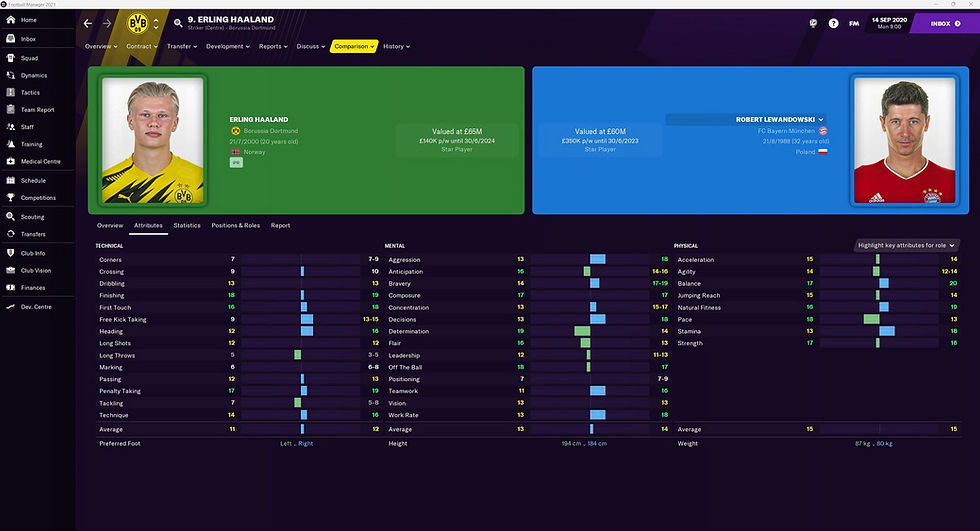
5 - Congratulations. Starting now, player images appear in large format on the following player pages: Overview - Attributes - Comparison.
Player profile

Player attributes

Player comparison
